You already have a table and the data has been entered, but the whole thing still looks like a draft version of the document? Formatting is what determines whether the reader immediately notices the headers and most important values or has to search for information among cells that all look the same.
In LibreOffice Writer, you can change practically every element of a table. You can set the background color, line appearance, spacing between the text and the edges, the width of individual columns, and the width of the entire table. What’s more, most of these settings can be found in one place.
In this guide, we will go from a basic table to a clear, organized layout ready to be used in a report, offer, instruction manual, or other document.
Where Are the Table Formatting Settings?
Start by clicking any cell in the table.
Then select:
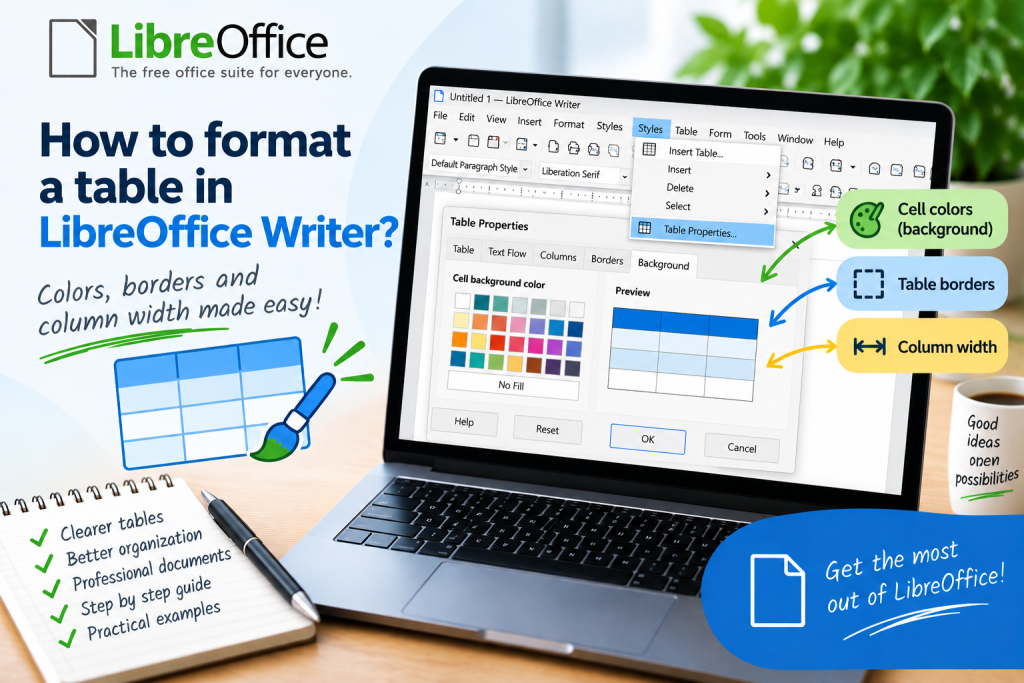
Table → Properties
A window containing the settings for the current table will open.
Here you will find, among other things, options related to the table size and position, text flow, columns, borders, and background.
This is the window we will return to for most of the operations described in this guide.
How to Change the Color of Table Cells?
Background color is a great way to highlight a header or particularly important data.
Suppose the first row of the table contains:
Product | Price | Quantity | Value
You want to distinguish it from the rest of the data.
First, select the cells in the first row.
Then open:
Table → Properties
Go to the background settings.
Choose the appropriate color and confirm the changes.
The color will be applied to the selected area.
Writer allows you to set the background for cells, rows, and the entire table, so you can control the appearance of the table very precisely.
How to Choose Colors So the Table Remains Readable?
More colors do not mean a better-looking table.
In a typical table, it is enough to highlight the header and possibly one particularly important row.
If every row has a different intense color, it will be more difficult for the reader to focus on the data.
It is also worth paying attention to contrast. Use light text on a dark background. On a light background, dark text will usually work best.
This will keep the table readable even after exporting the document to PDF.
How to Change Table Borders?
Borders allow you to determine which lines should be visible and how they should look.
Select the entire table or specific cells.
Then go to:
Table → Properties → Borders
Depending on the language version of the program, the name of this tab may differ slightly.
Here you can specify the line arrangement, style, thickness, and border color.
LibreOffice also allows you to control the outer borders and the lines inside the table separately.
How to Set Only the Outer Border?
Not every table needs a full grid.
If you want a simpler appearance, you can leave only the outer borders.
Select the table.
Open:
Table → Properties → Borders
In the section responsible for line arrangement, select the option containing the outer border.
Confirm the changes.
The inner lines can then be removed, while the entire table will still be clearly separated from the rest of the document content.
How to Change Only One Cell Border?
Writer does not limit you to predefined layouts.
You can select a specific line yourself.
Select a cell or group of cells, then go to:
Table → Properties → Borders
In the preview area, click individual borders.
This allows you to decide which lines should be visible, which should remain unchanged, and which should be removed.
Then set the style and color of the selected line.
This gives you much more control than applying a single predefined border to the entire table.
How to Set the Spacing Between Text and Borders?
Text placed right next to a cell border looks unattractive and makes it harder to read.
That is why it is worth leaving some extra space.
Open:
Table → Properties → Borders
Find the spacing to contents settings.
You can specify the spacing on the left, right, top, and bottom separately.
There is also an option to apply the same value to all borders.
Even a small increase in spacing can make the table look much more readable.
How to Change the Width of the Entire Table?
If the table is too wide or too narrow, you do not have to adjust each column individually.
Click inside the table and open:
Table → Properties
In the table settings, you can control its width, position, and spacing.
This allows you, for example, to create a table that occupies only part of the page width or one that stretches across the available area of the document.
Writer also allows you to resize the table using the ruler.
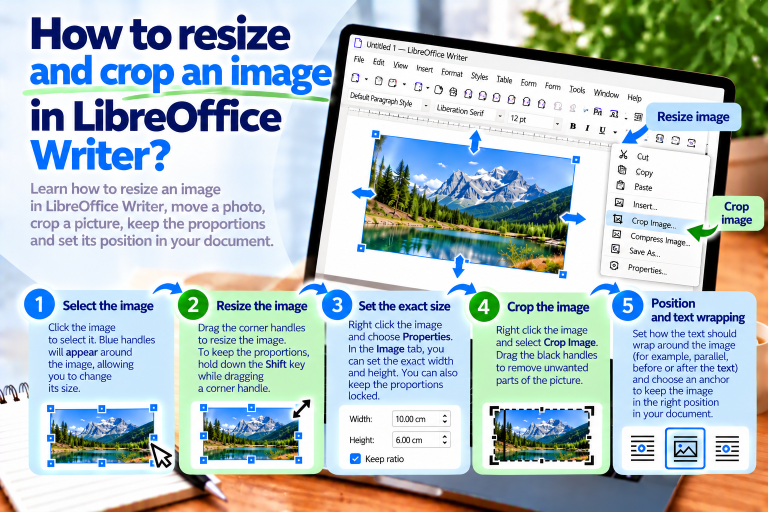
How to Change the Width of a Single Column with the Mouse?
This is the fastest method.
Place the mouse pointer exactly on the vertical line separating two columns.
When the pointer changes appearance, hold down the left mouse button.
Then drag the line to the left or right.
Release the button when you reach the desired width.
This method works very well when your main goal is to visually adjust the table.
How to Set Column Widths Precisely?
For documents intended for printing, you often need greater precision.
Click inside the table.
Then select:
Table → Properties → Columns
Here you can control the width of individual columns.
Suppose you are creating a table:
No. | Product | Quantity | Price | Value
The No. column does not need much space. On the other hand, Product may contain long names, so it should be much wider.
Instead of setting all columns to the same width, adjust their widths to the type of information they contain.
How to Automatically Adjust Column Width?
You do not always need to enter specific values.
Writer provides commands that allow you to adjust column widths to the content they contain.
Select the appropriate columns, then use the size optimization tools available in the Table menu.
One of the available options is optimal column width.
The program analyzes the content of the selected cells and adjusts the available space accordingly.
This is particularly convenient after pasting a larger amount of data.
How to Set All Columns to the Same Width?
Sometimes you need the opposite effect.
Suppose you are creating a weekly schedule and each column represents one day. In this case, all columns should have the same width.
Select the appropriate columns.
Then use the evenly distribute columns command available in the table tools.
Writer will adjust the widths of the selected columns while maintaining the overall width of the table.
This is much faster than manually setting each column.
How to Change Row Height?
Column width is only half the job. In some documents, you also need to change row height.
You can do this manually by dragging the horizontal edge of a row.
Writer also offers automatic height adjustment based on the content.
If you want identical rows, select several of them and apply even distribution.
This solution works well in forms, schedules, and tables intended to be filled out by hand.
How to Highlight the First Row of a Table?
The first row usually serves as the header.
That is why it is worth formatting it differently from the rest of the table.
For example, you can use bold text, a different background color, centered text, and a more prominent bottom border.
However, you do not need to use all available effects at the same time.
A simple header usually looks more professional than a highly decorative combination of several colors and different types of lines.
How to Align Text Inside a Table?
Good formatting does not end with colors and borders.
Select the cells, then use the basic text alignment tools.
Product names usually look best aligned to the left.
Numeric values can be aligned to the right.
Headers often look good when centered.
Consistency is the most important thing. If one column contains prices, all values in that column should use the same alignment.
How to Prepare a Simple Table for a Report?
You do not need a complicated design.
Suppose the table shows product sales.
The first row contains headers.
Give it a subtle background and make the text bold.
Then use a simpler background for the data.
Set a clear outer border and more subtle inner lines.
Make the product name column wider.
Columns containing short numbers can be narrower.
Finally, adjust the spacing between the text and the cell edges.
As a result, you will get a table that looks professional without distracting attention from the data.
Why Does the Table Width Sometimes Not Change as Expected?
Writer takes into account the relationships between the width of the entire table and the widths of individual columns.
Therefore, moving one boundary may affect the neighboring column.
The selected table alignment and its overall width also matter.
If dragging the lines does not produce the expected result, go to:
Table → Properties
Then check the settings for the entire table and the Columns tab.
This way, you can see the exact values instead of relying solely on the appearance of the document.
How to Remove All Table Lines?
Sometimes a table is used only to position elements in specific places, and you do not want its borders to be visible.
Select the appropriate cells or the entire table.
Then go to:
Table → Properties → Borders
Select the option with no borders.
Confirm the settings.
However, keep in mind that while editing, you may still see auxiliary cell boundaries. This does not automatically mean that they will appear when printed.
How to Quickly Fix a Poorly Formatted Table?
If the table is difficult to read, do not start by adding more colors.
First, check the column widths.
Then adjust the row heights and spacing inside the cells.
Only after that should you work on the borders and background.
This order matters because even the best color choices will not fix a table in which the text is squeezed into columns that are too narrow.
Table Formatting and Documents Intended for Printing
Before finishing your work, check the table in Print Preview.
Pay particular attention to the width. The table should not extend beyond the page area.
Also check whether the colors remain readable and whether the borders are not too subtle.
If the table contains many columns, consider changing the orientation of the selected page to landscape instead of reducing the text size too much.
This will help maintain the readability of the data.
Most Common Mistakes When Formatting Tables
The first problem is using too many colors. A table should primarily make data easier to read.
The second mistake is setting all columns to the same width without considering their content.
Another problem is insufficient spacing between the text and the borders. This makes the data look cramped.
It is also worth avoiding random combinations of different line thicknesses and colors. If every part of the table looks different, it becomes difficult to establish a clear hierarchy of information.
How to Format a Table in LibreOffice Writer in Practice?
If you want quick results, start with three elements.
First, adjust the column widths to the content.
Then highlight the first row with a subtle background color and bold text.
Finally, set consistent borders and slightly increase the spacing between the text and the cell edges.
These changes alone are enough to make an ordinary table look much more readable.
Only then is it worth experimenting with more advanced formatting.
When formatting a table in LibreOffice Writer, it is worth starting with its structure and only then moving on to its appearance. Appropriate column widths, readable spacing, and proper data arrangement are more important than using a large number of colors.
The most important settings can be found under Table → Properties. This is where you can control the width of the table and columns, borders, and background. Writer also allows you to manually drag column boundaries, automatically adjust them to the content, and evenly distribute the available space.
With these tools, the same table can look good both in a simple office document and in a comprehensive report prepared for export to PDF or printing.
:::